Tag Archives: Travel trailer

1963 Airstream Safari: Interior Skin, Paint, and Flooring

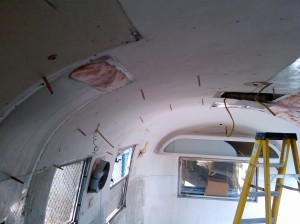
Once the Airstream had been rewired and insulated, the interior skin went back on.  I had numbered all the pieces and took numerous photos before I removed everything, so putting it all back on was pretty straightforward.

1963 Airstream Safari, vintage, travel trailer

The first piece goes back on.

I purchased some cool clips called Clecos that fit in the drilled holes for the rivets and held the sheets in place temporarily while I put in all the other rivets.  As one would expect these were

1963 Airstream Safari, vintage, travel trailer

Clecos holding skin back on while it is riveted.

extremely helpful for the large sheets on the ceiling.  It was basically a one day job to reattach and rivet all the panels and trim pieces around the windows.

The next day I lightly sanded all the new patches and any other areas that looked a little too smooth for painting, and primed all the interior surfaces with a good quality metal primer.  Once the primer was dry I top coated everything with a low sheen

1963 Airstream Safari, vintage, travel trailer

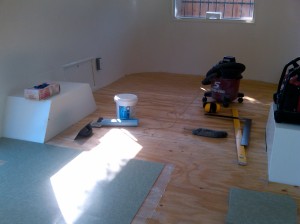
The painted interior with the new plywood and some flooring.

acrylic paint in a color called Swiss Coffee.  It is a neutral white that was developed for use in art galleries and museums, so it was a perfect choice for the studio use of this trailer.  Having the whole interior back in place and painted really brightened up the space.

Since the floor had numerous holes and patches I decided the best and most cost efficient route was to screw a new layer of plywood over the whole floor.  This would not only stiffen things up, but also provide an nice uniform surface for the vinyl tile to adhere to.  I cut some pieces of cardboard to template the rounded areas at both ends of the trailer and used them to get a good fit with my plywood.  Once the new plywood was adequately screwed in place I covered it with Armstrong VCT in a nice vintage looking color called Granny Smith (like the apples).  I then covered the small gap between the floor and the walls with a PVC quarter round moulding that I was able to bend around the curved ends of the trailer.  With the exception of some light fixtures that hadn’t been decided upon yet, the interior remodel was complete.  Things left to do included repairing the slightly bent door and putting new weatherstripping in all the windows.

1963 Airstream Safari, vintage, travel trailer

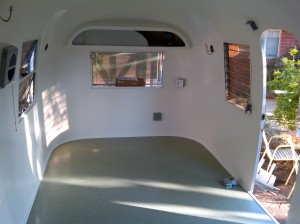
The completed interior, before furniture.

1963 Airstream Safari, vintage, travel trailer

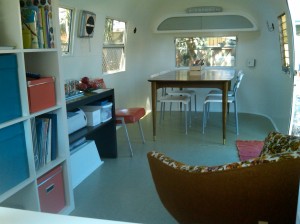
Interior completed, after furniture.

1963 Airstream Safari: Patching Holes, Wiring, Insulation

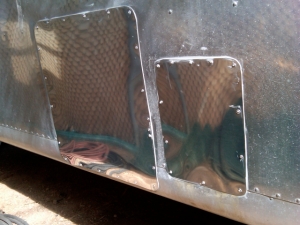
Once the structure was reinforced enough to support the new air conditioner, it was time to put it on the roof and patch some holes in the exterior skin.  I had an extra set of hands to get the new unit on the roof.  It is held in place by gravity and the interior frame and control unit, which will be attached after the interior skin goes back on.  Since the plumbing and appliances were all removed there were a few holes in the exterior skin that needed to be covered.  I ordered the appropriate aluminum sheeting (.032″ thinck 2024T3) from an aircraft parts supplier, as this is the same aluminum sheeting used on many airplanes.  (Airstream…get it?)

1963 Airstream Safari, vintage

Patches in the exterior skin.

Patching the holes amounted to cutting the sheeting into pieces the right size and temporarily holding them in place while holes for the rivets were drilled (duct tape worked well).  Once the holes were drilled I ran a bead of gray polyurethane caulking over the rivet holes and around the perimeter of the patch, put the patch in place, and riveted it on.

After all the holes were patched I sprayed the trailer down with a hose to check for leaks.  The few that I found were sealed with the same polyurethane caulk.  After I was satisfied that the Airstream was watertight I ran all my new wiring.  The electrical set-up for this trailer’s use as a studio is a bit different from a camping trailer.  None of the 12v wiring is really needed except for the few lights necessary to tow the trailer if it is ever moved or sold. Otherwise it was rewired much like a small house.  A 10 gauge, 30amp extension cord connects a new waterproof outlet on the trailer to a 30amp plug on the house that is wired from the main circuit breaker panel.  Once inside the trailer the electricity runs to a small breaker panel that divides the power into 3 circuits, a 20amp for the air conditioner, and two 15amp circuits for the lights and outlets.  The lights and outlets were located in many of the original locations, but a couple were added to satisfy the needs of the studio.

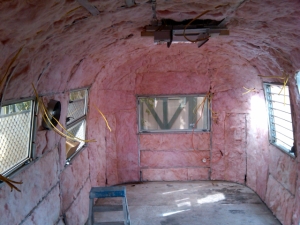
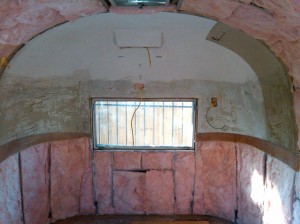
With all the wiring in place, I put on my mask and gloves and proceeded to insulate the trailer with fiberglass batt insulation.  Since the walls are only 1.5″ thick I used 3.5″ R-13 batts (designed for 2″x4″ walls) that I split in half to fit in the skinny walls.  Getting the insulation to stay in place on the curved walls of the Airstream was interesting.   Unlike a home with vertical walls and regular stud spacing that you can friction fit the fiberglass batts into, the trailer has curved

1963 Airstream Safari, vintage

The fuzzy, pink cocoon of the insulated Airstream.

walls.  Some of the spaces allowed  for the friction method, but all the insulation higher up the walls and in the ceiling had to be glued in place.  The old insulation appeared to be attached with roofing tar, so that is the approach I took as well.  I brushed stripes of the tar on at regular intervals and pressed the insulation into place.  This worked quite well except for the terrible odor of the roofing adhesive.  The next step will be reattaching the interior skin.

1963 Airstream Safari: Structural Roof Repair

Part of the reason the roof on this 1963 Airstream Safari was collapsing under the weight of the air conditioner has to do with the Airstream design.  Most of the structural aluminum ribs that arch up from the plywood floor to support the interior and exterior skins don’t span the entire width of the travel trailer.  Instead of making a complete arch from one side of the trailer to the other they stop at the center of the roof.  As they are also placed on alternating sides and 30″ apart on average, there isn’t a whole lot of load bearing capacity for anything besides the structure itself.  The reason the ribs don’t span from side to side seems to primarily involve window and door placement.  As a rib arches up from one side of the trailer there is either a window or the door in the way of that rib continuing down the other side.  One of these half ribs runs on either side of the opening in the roof where the air conditioner sits.  I decided the best way to spread that load out would be to continue the rib down the other side as far as possible.

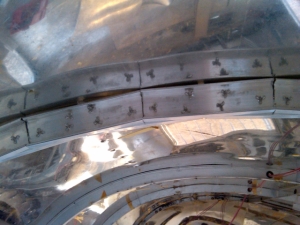
Since I couldn’t run out and buy new ribs at the auto part or RV store I had to fabricate them.  (I suppose I could have had a metal shop bend some aluminum C channel to the desired shape but that wasn’t really in the schedule or the budget.)  I bought some off the shelf aluminum C channel that was 1.5″ wide with .5″ legs and .125″ thick.  I cut it into lots of 6″ long pieces which I then riveted together in the approximate shape of the rib that I needed.

1964 Airstream Safari, vintage, rib repair

New rib riveted together.

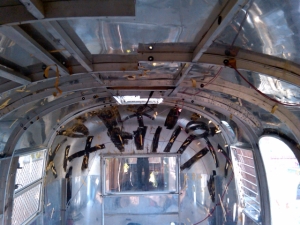
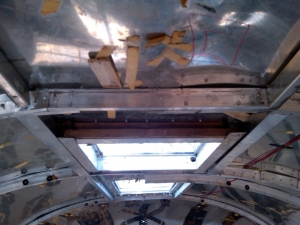
I determined that shape by forcing the roof back to it’s natural position with a couple boards wedged between the existing ribs and the plywood floor.  I was then able to rivet the 6″ sections on one at a time matching the contour of the exterior skin.  I also attached two pieces of 1.5″ square aluminum between the two ribs on either side of the air conditioner opening as extra reinforcement.

After everything was riveted into place I removed the 2 boards I used to wedge the ceiling in place.  The structure didn’t stay exactly in the desired shape, but the sagging was very minimal and infinitely better and stronger than what existed previously.  As a final test I grabbed onto the sides of the opening and pulled my feet off the ground to see how well it would support my 155 pounds.  It passed the test, so I had no worries that the new 95-100 pound air conditioner would be supported adequately.  Yes, that’s right I said new air conditioner.  It

1964 Airstream Safari, vintage, rib repair

View of two new ribs, one running partway down either side of the trailer.

was hoped that the 1970’s Coleman unit would be salvageable, but after I opened it up to have a look the news wasn’t good.  Rather than get everything back together and have the unit fail in a year or two it was decided to go ahead and replace it with a new one.  So it was ordered and the rewiring commenced.

1964 Airstream Safari, vintage, rib repair, air conditioner support

The air conditioner opening, now fully supported on 4 sides.